Easy Homemade Butterscotch Thumbprint Cookies: Your New Go-To Recipe
Are you searching for that perfect cookie recipe that’s both incredibly easy to make and guaranteed to impress? Look no further! These
butterscotch thumbprint cookies are a delightful answer to your dessert dilemmas. Imagine a soft, buttery cookie base cradling a rich, homemade butterscotch filling that melts in your mouth with every bite. This recipe isn't just about baking; it's about creating moments of pure joy, whether for a cozy family evening or a festive holiday gathering. Forget store-bought imitations; once you taste the homemade difference, these thumbprint cookies will become a cherished staple in your baking repertoire.
We understand life gets busy. Whether you're a professional juggling deadlines or a busy parent orchestrating daily activities, time in the kitchen can be precious. That's why this recipe for
butterscotch thumbprint cookies is designed to be straightforward, using simple ingredients and techniques that yield spectacular results without the fuss. It's your secret weapon for whipping up a gourmet-level treat effortlessly.
Why Butterscotch Thumbprint Cookies Are a Must-Try
The appeal of
butterscotch thumbprint cookies lies in their charming simplicity and incredible flavor depth. The contrast between the tender, slightly crisp edges of the cookie and the gooey, sweet butterscotch center is simply irresistible. They offer a comforting nostalgia reminiscent of classic homemade treats, yet with an elevated taste that feels wonderfully indulgent.
Visually, these cookies are stars. The distinct indentations, filled with golden butterscotch, make them an attractive addition to any dessert platter, especially during the holidays. And the best part? That glorious butterscotch filling is surprisingly simple to whip up from scratch, requiring just a handful of ingredients. Unlike some fillings that harden completely, homemade butterscotch sauce maintains a delightful softness, offering a lovely textural contrast to the cookie base.
Before we dive into the baking process, let's gather your ingredients. Quality ingredients are the foundation of any great cookie, so opt for fresh butter and good-quality brown sugar to truly let that butterscotch flavor sing.
Crafting the Perfect Cookie Base: The Heart of Your Thumbprint Treats
The journey to perfect
butterscotch thumbprint cookies begins with a well-made cookie dough. This section guides you through creating a tender, flavorful base that will perfectly complement the rich butterscotch filling.
Step 1: Preheat and Prepare
First things first, preheat your oven to 350°F (175°C). This step is non-negotiable for even baking. A properly preheated oven ensures your cookies bake consistently, achieving that coveted golden edge and soft center without over-browning or remaining raw. While the oven heats, line your baking sheets with parchment paper or silicone baking mats. This prevents sticking and makes for easy cleanup.
Step 2: Creaming for Perfection
In a large mixing bowl, combine
softened unsalted butter and
brown sugar. Beat them together until the mixture is light, fluffy, and significantly paler in color. This creaming process is crucial. It incorporates air into the butter and sugar, which expands during baking, resulting in a tender, melt-in-your-mouth cookie texture. Don't rush this step; the fluffier your mixture, the better your cookies will be.
Step 3: Whisking Dry Ingredients
In a separate bowl, whisk together your all-purpose flour, baking soda, and a pinch of salt. Whisking ensures these dry ingredients are thoroughly combined and evenly distributed. This prevents pockets of unmixed baking soda and guarantees a consistent texture throughout your cookies. Nobody wants a gritty bite!
Step 4: Combining and Forming
Gradually add the dry ingredient mixture to the wet mixture, mixing on low speed until just combined. Be careful not to overmix, as this can develop the gluten in the flour, leading to tough cookies. Once the dough comes together, roll it into 1-inch balls. The exact number of cookies will vary based on size, but typically this recipe yields around 30-32 delightful treats.
Place these dough balls on your prepared baking sheets, leaving a couple of inches between each to allow for spreading. Now for the signature step: gently press your thumb (or the back of a small spoon) into the center of each ball to create an indentation. This is where your delicious butterscotch filling will nestle. Don't press too hard, or your cookies might crack excessively around the edges.
Step 5: Bake to Golden Perfection
Bake your
butterscotch thumbprint cookies for 10-12 minutes, or until the edges are lightly golden and the centers are still slightly soft. Keep a close eye on them, as baking times can vary between ovens. You want them to be puffed up and just set, ensuring they remain tender after cooling. Overbaking can lead to dry, crumbly cookies, so pull them out as soon as they reach that perfect stage. Let them cool on the baking sheet for a few minutes before transferring them to a wire rack to cool completely. This helps them set and prevents breakage.
Mastering the Homemade Butterscotch Filling: Sweet Indulgence
The heart of these delightful treats is the luscious, homemade butterscotch filling. It’s surprisingly simple to make, yet delivers an unparalleled depth of flavor that sets these
butterscotch thumbprint cookies apart.
The secret to true butterscotch lies in the use of brown sugar, which imparts a rich, caramel-like complexity with hints of molasses. This is the primary difference from caramel sauce, which traditionally uses granulated white sugar. If you're curious to dive deeper into these delightful distinctions, check out our article on
Butterscotch vs Caramel Thumbprint Cookies: The Flavor Difference.
To make the butterscotch filling, you'll typically need just three core ingredients: brown sugar, butter, and cream (or milk). Gently melt the butter in a saucepan, then stir in the brown sugar and cream. Bring the mixture to a gentle simmer, stirring constantly until the sugar has dissolved and the sauce begins to thicken slightly. Remove it from the heat and allow it to cool slightly. As it cools, it will thicken further, reaching a perfectly spoonable consistency that remains delightfully soft even after setting in the cookies. This soft-set texture is a hallmark of authentic butterscotch, offering a satisfying chewiness without becoming brittle.
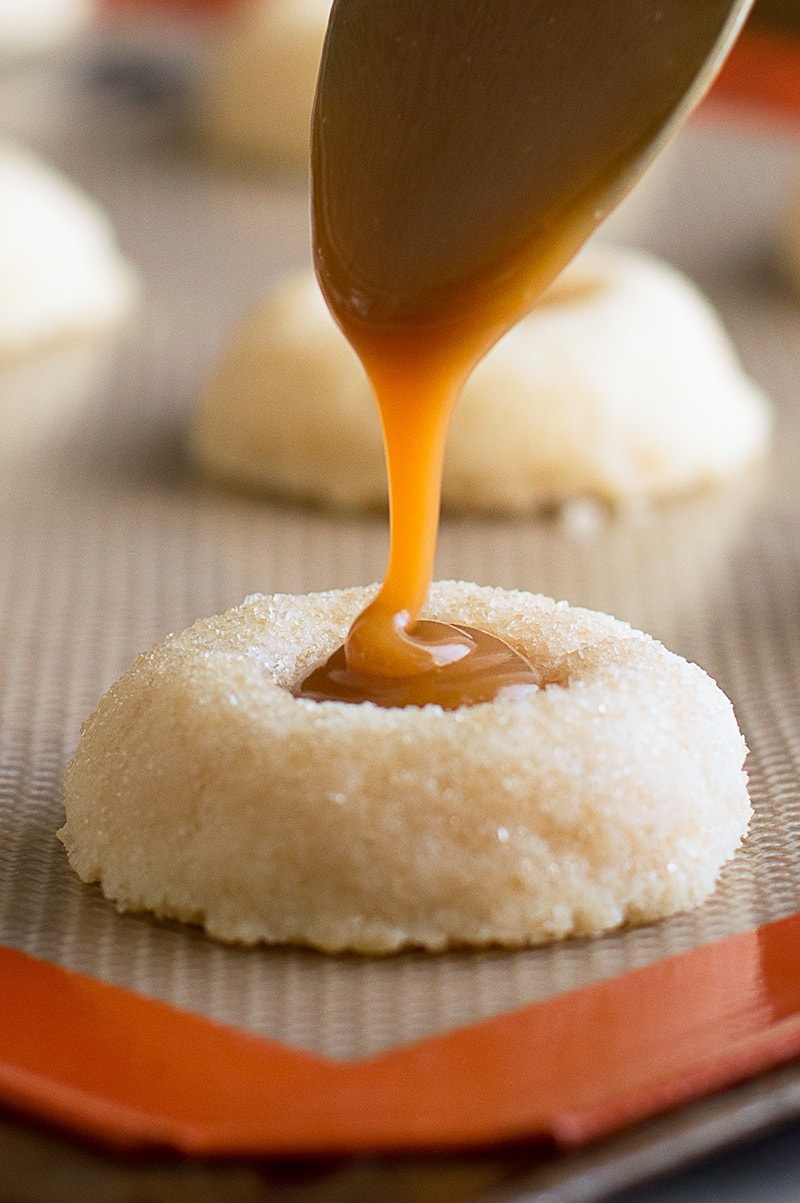
Assembling and Finishing Touches: The Art of Presentation
Once your cookies are completely cool, it's time for the grand finale! Carefully spoon your homemade butterscotch filling into each thumbprint indentation. Be generous, but avoid overfilling to prevent spillage. For an extra touch of elegance and to enhance the flavor, consider sprinkling a few flakes of sea salt over the butterscotch. The slight saltiness beautifully balances the sweetness of the butterscotch, creating an exquisite flavor profile.
For a vibrant twist, you could also experiment with a hint of citrus. While this recipe focuses purely on butterscotch, the combination of lemon and butterscotch is surprisingly delightful. For those who love a zesty contrast, explore variations like the ones found in
Zesty Lemon Butterscotch Thumbprint Cookies: A Gourmet Treat.
Allow the filled cookies to sit for about 20 minutes for the butterscotch to set slightly. It won't harden completely, which is exactly what you want for that perfect chewy-soft texture. Arrange your finished
butterscotch thumbprint cookies on a beautiful platter, and watch them disappear!
Tips for Success and Delicious Variations
Achieving perfect
butterscotch thumbprint cookies every time is easy with a few simple tips:
*
Softened Butter is Key: Ensure your unsalted butter is at true room temperature. This is vital for proper creaming and a tender cookie texture.
*
Don't Overmix: After adding the dry ingredients, mix only until just combined. Overmixing develops gluten, leading to tougher cookies.
*
Cool Completely: Always ensure your cookies are fully cooled before adding the butterscotch filling. If the cookies are warm, the filling will melt and run.
*
Storage: Store your cookies in an airtight container at room temperature for up to 3-4 days, or in the refrigerator for up to a week. For longer storage, they freeze beautifully for up to 2-3 months.
*
Flavor Enhancements: A tiny splash of vanilla extract in the cookie dough can deepen its flavor. You could also add a pinch of cinnamon or nutmeg for a warmer, spicier note, especially during the colder months.
*
Chocolate Drizzle: For the ultimate indulgence, consider drizzling a little melted dark or milk chocolate over the set butterscotch for a decadent finish.
These easy homemade
butterscotch thumbprint cookies are more than just a recipe; they're an invitation to create, share, and savor. They embody the warmth of home baking and the joy of simple, delicious pleasures. So, roll up your sleeves, preheat your oven, and prepare to bake a batch of cookies that will surely earn rave reviews. Happy baking!